|
|
||
|
||
|

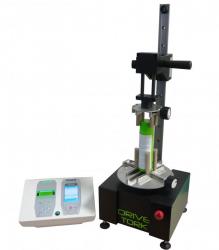
Designed for measuring screwing torqueTo measure torque accurately, it is necessary to regulate the test speed for repetitive results. The Drivetork, vertical torque bench makes it possible to perform torque measurements by avoiding the influence of an operator, thanks to regulated rotation at a constant speed. 
Main specifications of the DrivetorkVertical torque bench for measuring up to 12 Nm (100 in-lb). It can measure clockwise and counterclockwise. 
Accurate measurement chainThe Drivetork is equipped with two high-precision sensors: a torque sensor and an angle sensor. These two sensors are perfectly aligned to guarantee the quality of the measurements in the sample axis.The torque sensor is the sensitive element of the Drivetork. This sensor is available in different capacities depending on the measuring range on which it is used. The Drivetork can perform torque measurements from a few mNm (oz in) up to 12Nm (100 in-lb). These sensors are interchangeable and automatically recognized by the Drivetork. Therefore, it is possible to have several torque sensors to cover all measuring ranges. The accuracy of torque sensors is 0.5% of full scale. It is recommended to use them between 10% and 90% of their capacity. The angle sensor: measures incrementally with a resolution of 0.1 °. Adjusted directly on the axis of rotation, it aligns perfectly with the sample to ensure an accurate measurement of the angle. 
Data acquisition software CalifortSimply press the green arrow to start your test and measurements. There is no easier way to begin. User has access to the most important data and a limited access to the test configurations.  Technical specification:
Contents:
|

